Use any 6″ square pattern to make a pretty granny square purse

PLEASE NOTE: Since this post has run, I’ve had a lot of requests for 1-bag_purse-granny-brownthe exact pattern I used to make this purse. It’s called Lavender Square and you can find it at the Hooks and Yarns blog, at this link: https://www.allfreecrochetafghanpatterns.com/Granny-Square-Patterns/Lovely-Lavender-Square. I’ve added the types of yarn I used in the instructions below. I did the first 4 rounds of the square in variegated and the remaining rounds, plus the border in the solid color.

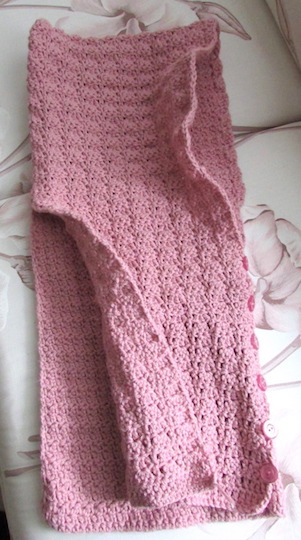
This 18″ wide x 10″ deep purse is roomy enough to carry everything but the kitchen sink.

Use any crochet square pattern you like (there are zillions to choose from on the Web), use your favorite yarn colors, and put them together using my template samples shown below, which require 10 squares.

For the purse shown, I used a 6 mm crochet hook and my squares were approx. six inches. I used a variegated color for the first few rounds of the square (Impeccable Earth) and a dark taupe (Red Heart Super Saver Café Latte) for the last couple of rounds. You can make your purse larger or smaller, depending on the size of square you choose to use.

How to make your purse:

Choose the square pattern and yarn that you’d like to use. (I used the Lavender Square from Hooks and Yarns at http://hooksandyarns.blogspot.ca/2013/02/simply-pretty.html. For the variegated yarn, I used Impeccable Loops & Threads in Earth, and for the solid color, I used Red Heart Super Saver in Cafe Latte. (This link at Crochet Pattern Central offers tons of 6″ crocheted square patterns to choose from! https://www.crochetpatterncentral.com/directory/6in_squares.php )

Make 10 squares.
(1) Using your edging color (mine was the taupe), seam your squares together in three separate pieces (with one extra single square, set aside) as shown below, attaching them (right sides together) using single crochet. The x’s in the picture here show where the squares have been seamed. So you should end up with one row of two squares, one row of three squares, one row of four squares, and one single square.
2-seam-squares
(2) Next, you need to seam your rows together exactly as shown below, with the row of two attached to the row of three, the row of three attached to the row of four, and the single square attached to the right side of the row of four. The x’s shown represent where you’ve seamed, using single crochet again.3-seam-rows
(3) Once your squares are all seamed to form one piece, you can line your purse with fabric if you want. As you’ll see in the photo below, my impatience makes me sloppy with sewing my lining, so you might want to slow down and use tidier stitches! Anyway, I just cut a piece of fabric in the same shape as my one piece of seamed squares and hand-sewed it with needle and thread to the wrong side, making sure that the last row of crochet around the entire piece is uncovered so you’ll be able to seam the edges together when you fold it.4-lining
(4) Once the lining has been sewed in place, fold exactly where the dotted lines are shown below, placing right sides together and lining up edges, then seam edges together with single crochet. The longest dotted line is the bottom of the purse and the two shorter dotted lines are the sides of the purse. To make things neat, I crocheted a border around the mouth of the purse using two rows of single crochet.
5-fold
(5) Next, using the taupe yarn, I crocheted 4 simple rectangles for the handle rings, 3″ wide (6 dc + turning wide) x 5.5″ long, and I used a yarn needle to sew one to the wrong side of each of the four points where the handles will be attached.
6-front-back-handles
(6) The rings are actually wood curtain rings that I picked up at Fabricland (removing the little hook screwed into each one). Wrap the loose end of each of your rectangle tabs around each wood ring, and sew it securely again to the wrong side with your yarn needle.
7-handle-ring
(7) For the two straps, I used the taupe yarn, crocheting each one approx. 1.5″ wide x 32″ long (6 dc + turning across). Then I wrapped the very ends over the rings and used my yarn needle to stitch them on securely (sewing on wrong sides). As shown below, one strap is positioned on one side of the purse, the other strap on the other side.
8-handles9-all-handles
(8) Next, I made a fastening tab with a buttonhole space for closing the purse. I crocheted it 3″ wide x 5.5″ long (10 dc + turning wide) minus edging. Once finished, I used my yarn needle to stitch it to the center of the back side of the purse, then I used my variegated yarn to single-crochet a border around the edges.
10-buttonhole-flap
(9) Last, I sewed a wooden button to the middle front of the purse, about an inch down from the edge.11-button-placement

I’m fairly new at making up my own patterns, and still getting used to writing tutorials, so I’m sorry if I’m unclear at any point. I get so enthusiastic when I start a project, I just dive into it, and then I find myself thinking halfway through that I really should have been making step-by-step notes. Hopefully, I’ll get better at this as time goes on!12-bag_purse-granny-brown2

Global warming is alive and well in Toronto

Ok. It’s February, right? Or did I fall asleep and miss a couple of months?
I just went outside for my daily walk, and it’s so warm, I had to peel off my coat and walk in t-shirt sleeves. And I was still working up a sweat! Today is supposed to break historic weather records. Winter has sure changed since the days of yore…

Last week…

016b-feb12_snow-day4

016b-feb12_snow-day8


This week…

img_0264 img_0262


Hot damn! I’d like to give that groundhog a great big bear hug!


My pattern will be featured at ALLFREECROCHET.COM

I just received news that my pattern from yesterday’s post will be featured at one of my favourite crochet sites, ALLFREECROCHET.COM. You can see it here: https://www.allfreecrochet.com/Scarves/Hoodie-Scarf-Pattern

#FaveCrafter

Keep warm with these two Crocheted Hoodie Scarf patterns

1When you live in a climate that requires dressing to stay warm from November to March, a hoodie scarf becomes one of your most treasured pieces of outdoor clothing!

A hoodie scarf is easy enough for a beginner to work on, as it’s basically just a long, wide scarf folded in half and seamed down from the fold on one side to create a hood. It’s both a hat and scarf in one handy piece.

Since a hoodie scarf is simply a big rectangle, you can experiment by using any of your favorite stitch designs, as long as you make your initial chain wide enough to create a proper hood. It’s a really fun project to work on—you can mix colors and patterns, combine different types of chunky yarn, and it doesn’t take long to complete!

2I’ve supplied very basic instructions so you can experiment with two different types of hoodie scarf.

As a basic guideline, my hoodie scarves are approximately 50″ long x 10.5″ wide.

For the Two-Textured Rose pattern, each 25″ side is crocheted in a different stitch design.

The scarf was crocheted in one piece and then folded in half, with the fold made where the two different stitch designs meet each other.

Two-Textured Rose Hoodie Scarf 

Materials:

  • One ball of Phentex Worsted yarn, Light Old Rose (14 oz/400g/ 867 yds/792m)
  • 5 mm crochet hook
  • Six ¾” rose-colored buttons
  • Sewing needle and pink thread for sewing on buttons

3First side (Texture 1): Ch 43

Row 1: Sc in 2nd ch from hook and in each ch across.

Row 2: ch 2, skip 1st st, *(sc, dc) in next st, sk next st,
rep from* across, sc in last st, turn.

Repeat Row 2 until piece is approx. 25 inches long. Don’t fasten off.

Second side (Texture 2):
Continue crocheting, but working in a different pattern.

Row 1: Ch 1, sc in each st across, turn.4

Row 2: Ch 3, sk 1 st, *3 dc in next st, sk 1 st, 1 dc in next st, sk 1 st,
rep from* across to last 3 sts, 3 dc in next st, sk next st, dc in last st, turn.

Repeat Row 2 until this second half is the same length as the first half, or approx. 25 inches long.

Finish final edge with a row of sc in each stitch/space across. Fasten off and weave in yarn end.

Lay scarf out flat with right side facing you, and then fold scarf in half, placing right sides together (where Texture 1 ends and Texture 2 begins) so that you’re now working with the wrong sides.

5To seam back of hood: At left side, starting from fold, measure 10.5″ down; place a marker through both scarf edges. Using crochet hook and same color yarn, use slip stitch to seam sides together from fold to marker. Fasten off and weave in yarn end.

To make front hood edging: Turn hood/scarf inside out to the right side, which is where you’ll be working now. The edges opposite to the hood seam will be the front edges of the hood. On the left side of the front hood edge, place a marker 10.5″ down from the fold (same distance down where your hood seam ends), then measure the same distance down on the right side and place a marker there.6

In the marked space on the left side, connect your yarn with a slip stitch; dc in the next space and in each space around until you reach the marked space on the right side. Slip stitch into that marked space, and then fasten off and weave in yarn end. Because there are different stitch patterns on either side of the hood, just try to dc as uniformly as you can in the spaces you have to work with.

You can also do a shell edging instead of the plain dc—simply start with your slip stitch, then *dc in the next space, skip a space, 3 dc in the next space, skip a space, and repeat from * around, ending with a dc and then a slip stitch in the last marked space.

Front buttons: (working on the right side) Placing a marker about 3.5″ down from the front edging on the right side of the scarf, I sewed six ¾” buttons, evenly spaced apart, from the marked space to the bottom of the scarf. The texturing of the left side scarf edge allowed for natural “buttonholes” that fit neatly over the buttons so that the scarf can be securely buttoned from under your chin to down over your chest, and will lie nice and flat under a buttoned-up coat.

chunky-hoodie2Warm & Fuzzy Infinity Hoodie Scarf

This was actually just an experiment in using two completely different types of yarn together (both chunky) and it turned out with wonderful results! You can try using the same pattern with two types of any chunky yarn.

This is how I did it:

Materials: One ball of super bulky Red Heart Light & Lofty yarn in Beachy Keen (4.5 oz/127g/105 yds/96m); One ball of Bernat Roving yarn in Taupe (100g /3.5 oz/109m/120 yds)chunky-hoodie1

6.5 mm crochet hook

Finished width: 10.5″ / Finished length: approx. 62″

Use any stitch pattern you like to achieve the above dimensions.

I used the Roving yarn until the ball ran out (with just enough left for sewing the hood seam), which created a piece that approx. measured 40″, then I continued with the Red Heart Light & Lofty and continued in the same stitch pattern until that ball ran out (with just enough left to seam together the scarf ends to make it into an infinity), which gave me another 22″.

chunky-hoodie3I used this simple v-stitch pattern for the entire scarf:

#1. Chain until you have a 10.5″ width + 2 extra chains.

#2. Turn, sc in second chain and in each across. Turn.

#3. Ch 3, skip 2 spaces, *single v-stitch (1 dc, ch 1, 1 dc) in next space, sk 2 spaces, double v-stitch (2 dc, ch 1, 2 dc) in next space, skip 2 spaces, repeat from * across and end row with: single v-stitch, skip 2 spaces, dc in last space, turn.

chunky-hoodie4Repeat #3 for entire until first ball of yarn runs out, attach second yarn ball, and continue with the same pattern until it runs out.

You’re going to make sure that the hood is made from the longer (40″/Roving) portion of the scarf. To do this, fold your scarf (right sides together) so that the row where you fastened the second type of yarn is 10″ below the fold. Using the leftover piece of Roving yarn, seam both edges of one side together to form the hood.

Then, using the piece of leftover Red Heart yarn, seam together the two scarf ends so that it becomes an infinity.

chunky-hoodie6I never bothered with any edging because with the yarn being so chunky, it doesn’t seem to need any, but feel free to add some single-crochet edging around if you so desire.

Now, try on your new hoodie scarf. You can wear the infinity part loose, or twist and wrap it around your neck to the back of the hood, which will keep your neck extra warm. Enjoy!chunky-hoodie7

chunky-hoodie5

Can you remember your very first childhood crush?

redhaired-boyHe had thick, dark red hair, and was king of the playground.

I was in seventh grade and new nothing about love. But I did know that he made my heart flutter every time I looked at him.

His name was Paul Warner. It was obvious that he was a popular boy, since all the other boys (and girls) gravitated toward him at recess like a pack of wolves to the alpha.

Boys like him never noticed girls like me—girls who wore their shyness like a cloak of invisibility. If he had ever glanced my way, I know I would have blushed ten shades of red and found the toes of my shoes to be suddenly engrossing.

daydream-girlI daydreamed often about Paul Warner throughout that school year; sweet vignettes that materialized in my mind whenever I should have been focusing on a math problem or listening to the teacher’s commentary on the Hundred Years’ war…

What if Paul Warner bumped into me at recess…and smiled at me…

What if Paul Warner turned around in class…and asked to borrow my pencil… 

What if Paul Warner took the empty seat beside me on the school bus…and…

Perhaps this first crush was simply an omen of my future—a sign that a different Paul was predestined to enter my life someday, the Paul that I would fall in love with and marry happily ever after.

Alas, Paul Warner was never in the cards for me.

girl-dreamingSeventh grade reached its denouement, my family and I eventually moved away, and life rolled on. It wasn’t long before I was head over heels in love with my very first celebrity crush (that’s a story for another day). Paul Warner became as distant a memory to me as Scholz’s star is to Earth.

Although Paul Warner knows nothing of my existence, nor will he ever, I do hope that life’s been good to him. After all, there will always be a special place reserved in my heart for my very first childhood crush.

Now tell me—who was your very first childhood crush?